

Game Frame Wi-Fi Adapter Documentation
The Wi-Fi Adapter transforms Game Frame into a connected display and greatly expands its capabilities. I suspect that this feature set is just the beginning, and as more people suggest ideas in the forums or add to the source code themselves, I’ll continue to update this page with the latest information.
Setup
https://player.vimeo.com/video/178282058
- Follow the Connect Your Photon instructions on the Particle site to get your Photon online.
- Download the latest Game Frame Wi-Fi firmware and use the firmware manager to perform a wireless update.
- Unplug your Game Frame and remove the four screws on the rear. Set the rear panel aside.
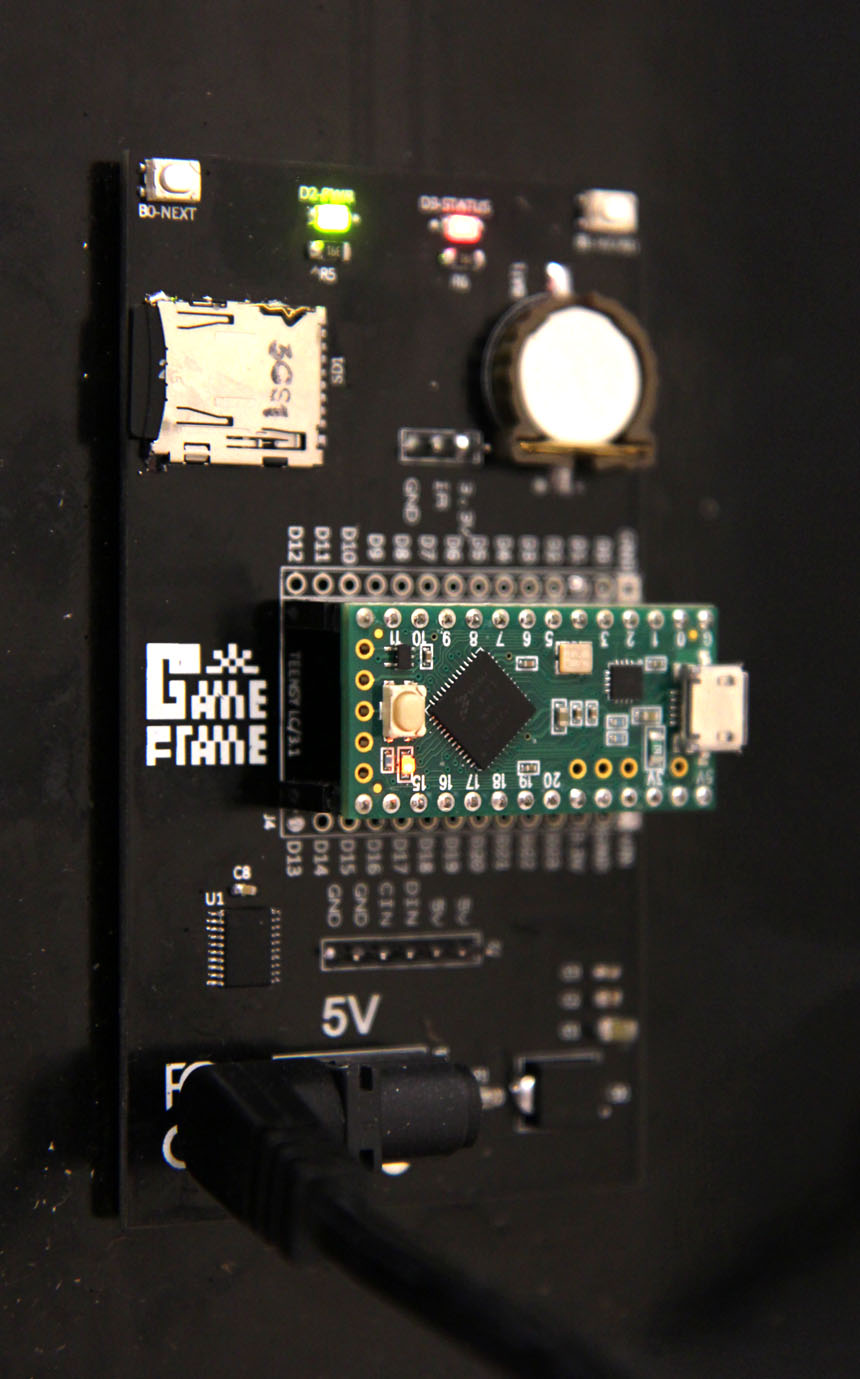
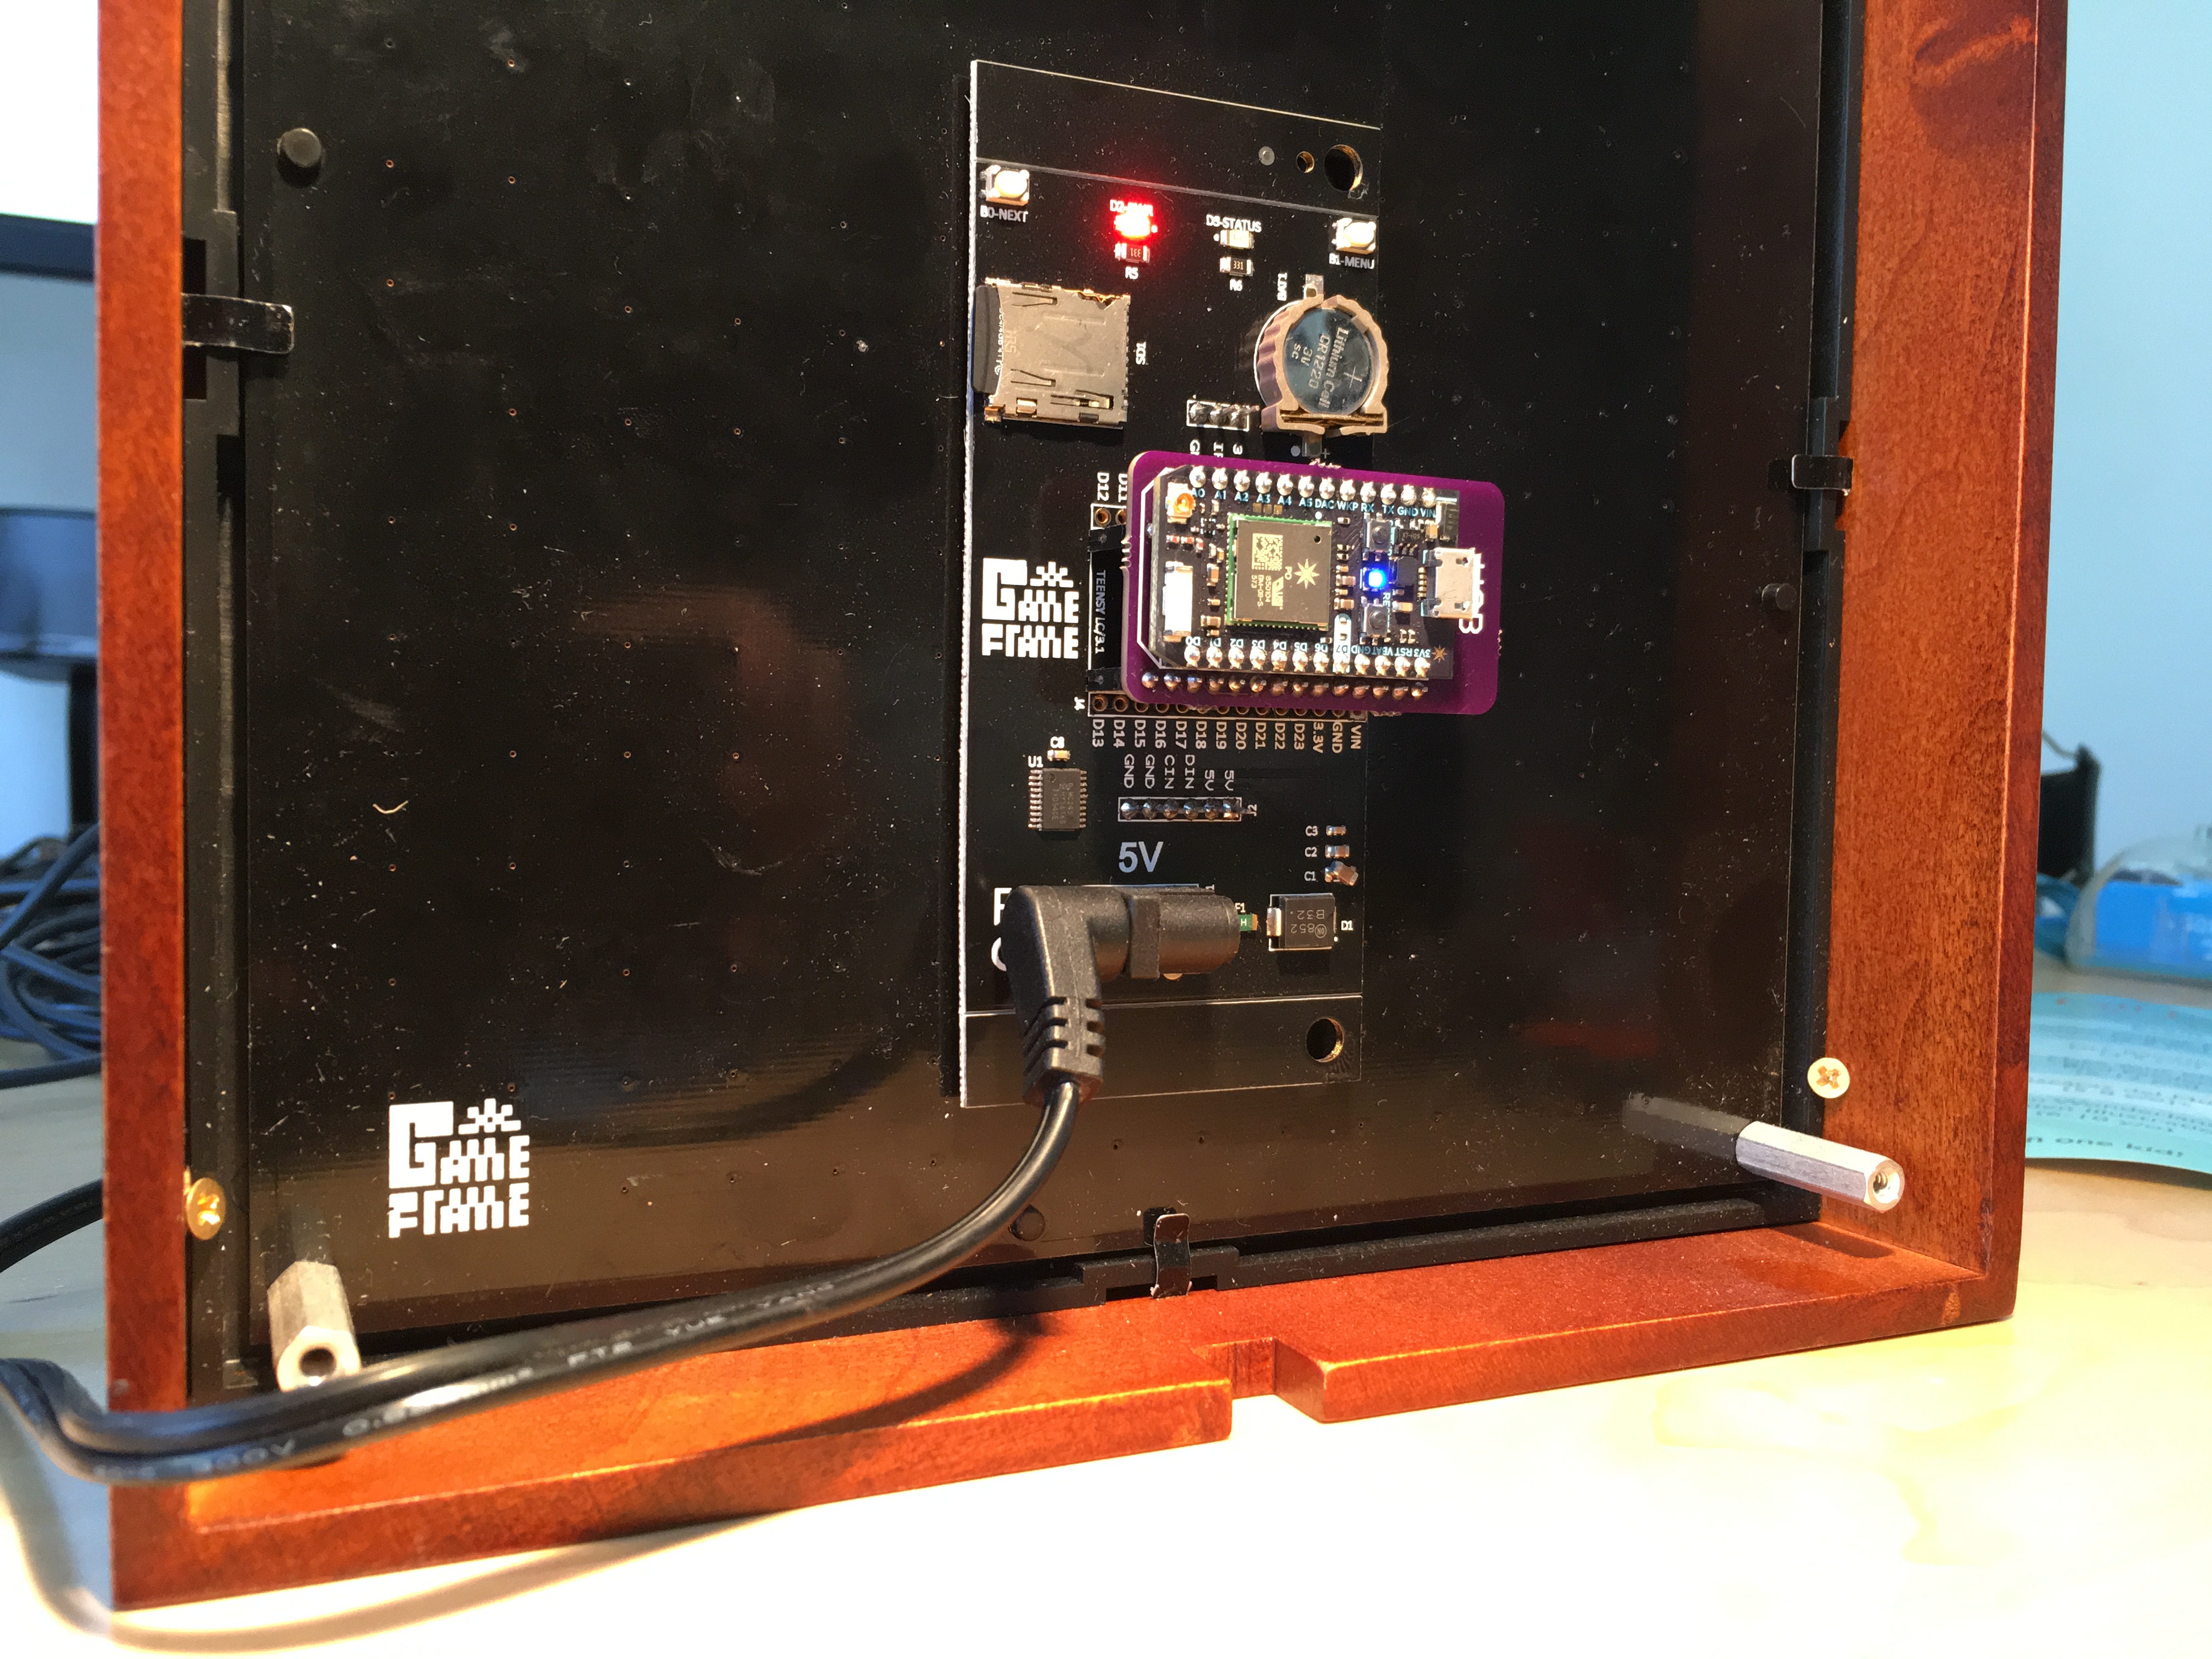
- Pull out the green Teensy LC, noting the USB orientation, and replace it with the Wi-Fi adapter in the same orientation. Refer to this photo, and double check that all of the pins are inserted and not offset.
- Download the Game Frame Wi-Fi system files and extract them onto your microSD card. It should create a /wifi folder inside /00system. You’ll need a microSD reader for your computer. If you don’t already have one, something like this works well.
- Insert the microSD card back in the Game Frame and plug in the power cable.
- You’re done! You may optionally replace the rear panel.
Getting Started
After you follow the setup process, Game Frame will restart and scroll an IP address across the screen. If you miss it, unplug the Game Frame and plug it back in (or hit the little RESET button on the Photon). It consists of 4 numbers, and you simply type these into your web browser with a period between each one (e.g. 192.168.1.150). After a few seconds you should see a web page where you can control every aspect of Game Frame.
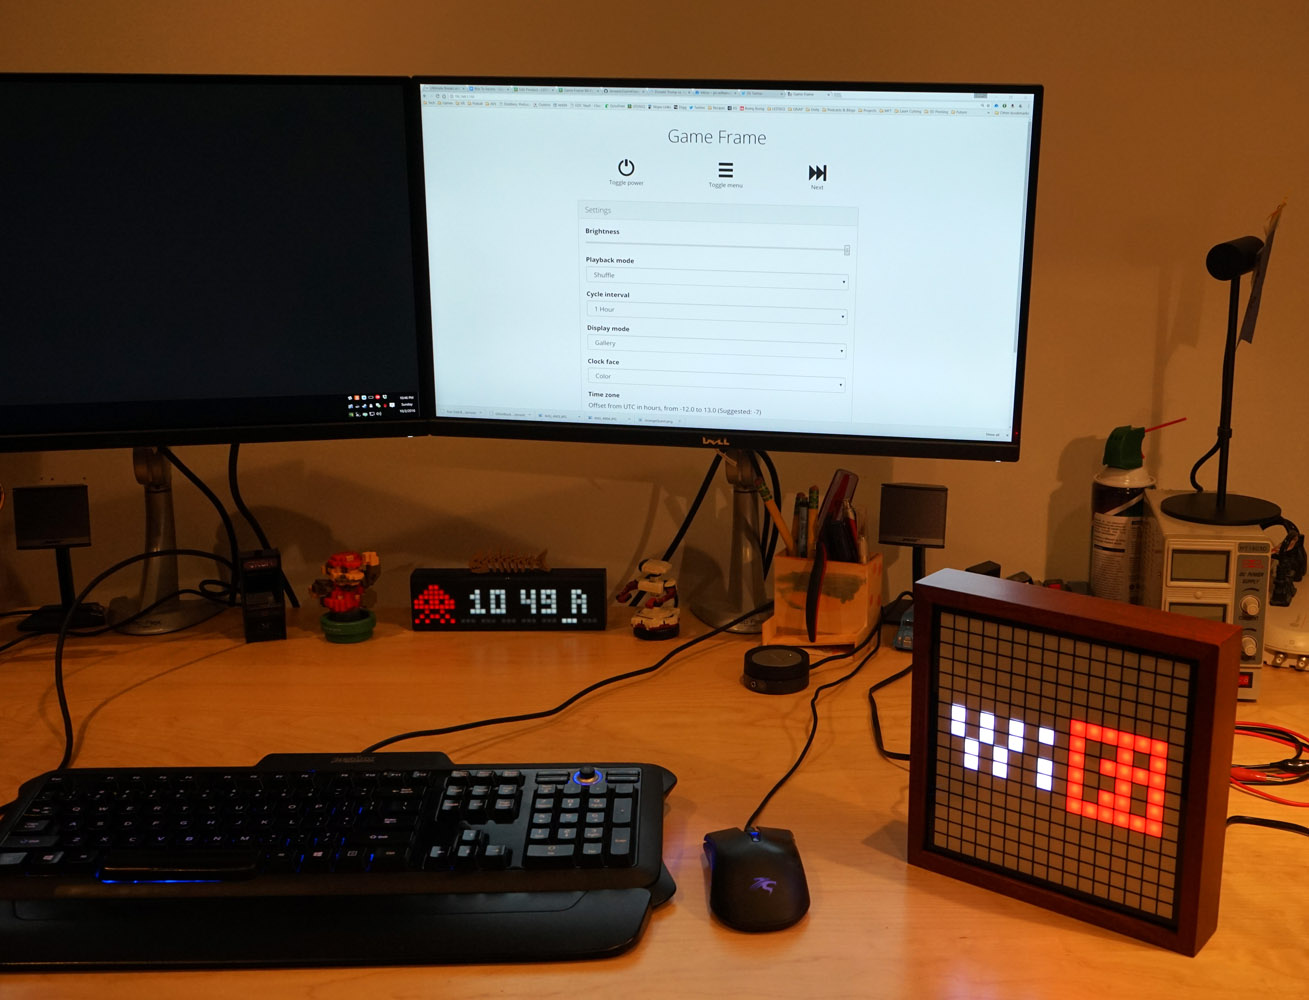 The first thing you should do is set your time zone in the Settings tab (try the suggested value if you don’t know your UTC offset). Then explore! Experiment with the different clock faces you probably didn’t know existed. Play your favorite animations on demand. Note that the web server is very lightweight and kind of fragile. If becomes completely unresponsive you may need to restart Game Frame or improve the Wi-Fi signal.
IFTTT
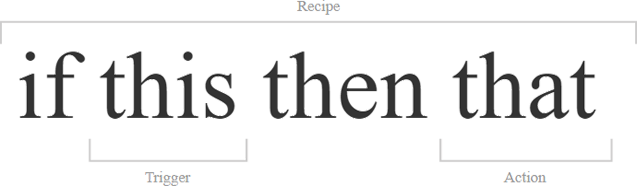
In my opinion, the real fun of a connected Game Frame comes with IFTTT functionality. IFTTT stands for If This Then That, and it’s a free service that makes it extremely easy to interconnect online services and devices. So, for example, we can say IF we get a new email, THEN display a visual alert on Game Frame. No coding is necessary, even though the name IFTTT is a play on a programming term called an If Statement.
I’ve published a handful of IFTTT “Applets” that you can use to connect Game Frame to Gmail, Twitter, SMS, and even NASA to monitor when the International Space Station flies over your house. But these are just a small sample of what’s possible. You’ll soon want to dig into IFTTT and create your own Applets, making Game Frame respond to your own needs, devices, and services. Let’s explore how that’s done.
Now that Game Frame is online, it has new “functions” available to the Internet. When you create a IFTTT Applet, you call one of those functions. For example, the “Schedule Game Frame Power” Applet calls the “Power” function. When calling a function, you may also pass it input, like “on” or “off.” Here is a list of all of the available functions.
- Command: A catch-all function that allows your to call any other function. See the SMS Applet below.
- Next: Simulates hitting the NEXT button on the remote. Skips to the next animation.
- Power: Toggles power when no input passed. Inputs “on” or “off” are also valid.
- Play: Plays the animation folder specified in the input (e.g. Play bird).
- Alert: This behaves like the Play function but it is intended for non-looping, one-shot animations. Unlike Play, the currently playing animation is paused while an alert is shown and then resumed upon completion. (This is particularly useful when your Game Frame contains long form animations like complete movies.) It also plays immediately when in clock mode. Please note, alerts always play to completion, regardless of the system playback settings. This means if you pass a looping animation to the Alert function, it will play forever! Also, any subsequent Alerts are discarded while an Alert is currently playing.
- Brightness: Changes the screen brightness. Valid input is a number 0-7, corresponding to the 7 levels of brightness available in the menu plus off. (A brightness value of zero is slightly different than toggling the system power in that the built-in Game Frame automatic brightness control feature will still function.)
- Color: Fill the screen with a solid color. Valid input is standard HTML HEX codes (e.g. “#FF0000” for red) or “random” for a random color.
Example: Creating a SMS Applet
When creating a IFTTT Applet, you’ll start by choosing your action — the “IF” part. You can get lost browsing all of the available services and options, but let’s setup one of my favorites: SMS.

- Start creating a Applet by clicking the big THIS link, and then search for SMS.
- Choose SMS (or Android SMS if you pack a Google Phone).
- You’ll then pick the type of trigger. We want the most broad one that says, “Send IFTTT any SMS” or “Any new SMS received.”
- Click Create Trigger, and then we’re on to the THAT part of the Applet. Click the big blue THAT.
- Search the services for Particle and click it.
- Choose the “Call a function” action from the list. In all likelihood, this is the only action you’ll ever use for Game Frame Applets.
- Hit the dropdown list and you’ll see all of the functions I described above. Choose the “Command” function.
- Below the dropdown you’ll see the “input” field. It should default to a gray box with the word, “Message” inside it. This is what you want. The gray box represents what IFTTT calls an “ingredient,” which in this case is the content of the SMS received.
- Click Create Action, and then click Create Applet.
- You’re done!
Now you can send a text message to the phone number IFTTT assigned you with any of the above functions, followed by the input! For example, try any of the following.
I have also provided a finished SMS Applet, but hopefully this step-by-step helps you understand how Applets work well enough to start making your own. If you discover a need for any other functions, or create some cool Applets you want to share, please drop by the forum. I’d love to hear from you.
WIFI.INI
There is a file on the microSD card here: /00system/wifi/wifi.ini
By configuring this text file you can change your Wi-Fi credentials or simply stop Game Frame from using Wi-Fi at all. This is especially handy if you bring Game Frame to a new network temporarily. Just edit the file to contain the new Wi-Fi security credentials, and optionally create a backup copy of your main one for later use. Alternatively, you may use the Particle App to reconfigure the Wi-Fi credentials by putting the Adapter into Listening Mode.
Advanced Use
The information below is totally available for you to tinker with, and I will help where possible, but it should be considered unsupported. The LEDSEQ forums is be a great place to ask questions and share ideas.
The functions listed above can be called in a variety of ways besides IFTTT, all offering greater control and faster responses. These methods leverage the Particle cloud API and they include a REST API, a Javascript SDK, and SDKs for iOS, Android, and Windows.
Before diving into these methods, you’ll want to know a little information about your Photon, namely your Access Token and your Device ID. You can find both by logging into the cloud-based Particle IDE. Select Settings (the gear icon in the lower left) to see your Access Token. Select your Photon under Devices (the crosshair icon) to see your Device ID. Copy and paste these numbers somewhere handy.
One of the great benefits of the Particle ecosystem is this notion of exposed functions. These are functions that run on the the device (in the case, Game Frame) that can be executed via the Cloud.
I have exposed several functions but the main one you’ll use is simply called “Command.” As described in the IFTTT section above, it’s a catch-all function that allows you to control all aspects of Game Frame. This is accomplished using one or two arguments, as needed.
Here is a list of all possible arguments for the Command function.
| Argument 1 | Argument 2 | Description |
| next | Next animation. | |
| brightness | 0-7 | Set brightness level. |
| power | on/off | Power up/down the Game Frame. Leave argument 2 blank to toggle. |
| play | 8.3 folder name | Play a specific folder by name. |
| alert | 8.3 folder name | Play a specific folder by name as alert. |
| color | RGB color code | Fill the display with a specific color (i.e. #FF0000 for red). You may also pass “random” for a random color. |
| clockface | 1-5 | Change the clock face graphic. |
| timezone | UTC Offset | Offset from UTC in hours, from -12.0 to 13.0. |
| playback | 0-2 | Playback mode (0=Sequential, 1=Shuffle, 2=Pause animations). |
| display | 0-2 | System mode (0=Gallery, 1=Clock, 2=Effects). |
| cycle | 1-8 | Animation duration (1=10s, 2=30s, 3=1m, 4=5m, 5=15m, 6=30m, 7=1h, 8=infinity). |
| reboot | Reboot Game Frame. |
Some examples:
Play Golden Gate Bridge animation (i.e. /bridge folder):
play bridge
Change screen color to purple:
color #9400D3
Switch to clock mode:
display 1
These are essentially single strings that you pass to the Command function, and it parses the arguments. Now the trick is to call the function from any number of ways, as mentioned earlier.
For instance, you can use CURL to toggle the system power:
curl https://api.spark.io/v1/devices/<deviceIdHere>/command -d arg=”power” -d access_token=<tokenHere>
Or you can play the coffee animation:
curl https://api.spark.io/v1/devices/<deviceIdHere>/command -d arg=”play coffee” -d access_token=<tokenHere>
Similarly, you here is a basic example of a web page that toggles the Game Frame power:
<!DOCTYPE HTML>
<html>
<script type=”text/javascript” src=”http://cdn.jsdelivr.net/particle-api-js/5/particle.min.js”>
</script>
<body><script type=”text/javascript”>
var particle = new Particle();
var deviceID = “<device ID here>”;
var accessToken = “<access token here>”;function powerToggle() {
particle.callFunction({ deviceId: deviceID, name: ‘command’, argument: ‘power’, auth: accessToken });
}</script>
<button onclick=”powerToggle()”>Click me</button>
</body>
</html>
You can perform similar actions through POST requests or any of the SDKs. If you want to dig deeper, the Particle Reference is your friend. Happy coding!