Game Frame LED Panel
$50.00
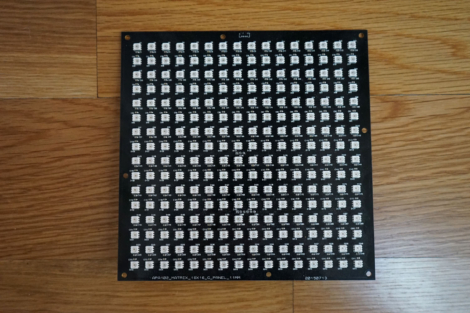
This is a replacement LED panel for Game Frame. It includes 256 LEDs, an IR receiver, and daughter board. It does not include a Teensy processor, coin cell battery, or microSD card.
Description
PANEL REPLACEMENT
The assembly is pretty simple but the main concern is the glass in front of the display. You want to be very careful with that. It is not only fragile but you can damage the black grid silkscreen if you scratch the rear side accidentally.
Start by laying the Game Frame face down on a cloth or towel so the rear is facing up. Remove the four screws securing the cardboard back panel and set the panel aside. The display comes out of the rear pretty easily — just bend the metal tabs back and remove the shipping safety screws if you haven’t already. Carefully lift the display assembly out of the frame. With some luck, the glass should stay in the frame, resting on the front edges. If not, carefully separate the glass from the black plastic grid housing and lay it gently in the frame, being careful not to damage the black silkscreen.
Lastly you just have to separate the LED panel from the plastic grid (another four screws). Remove the vellum if necessary — it may be glued in place to avoid shifting in front of the IR receiver on the display assembly. That’s it.
Reverse the steps to re-assemble. As a final step, just before bending the rear metal tabs to secure the display, plug in the Game Frame and make sure that that black plastic grid is aligned with the painted silkscreen. You may need to shift the glass with your thumbs slightly before securing it with the bendy tabs. You may optionally replace the shipping screws, but they shouldn’t be necessary.
Additional information
| Weight | 1 lbs |
|---|---|
| Dimensions | 10 × 10 × 4 in |
You must be logged in to post a review.


Reviews
There are no reviews yet.